


Deploy OpenFaaS serverless platform on Kubernetes cluster using Rancher
Introduction to Serverless computing


In this article, I will focus on setting up a serverless platform with the open-source platform to have a glance through this paradigm – the first step to deep dive into the serverless journey.
Serverless (also known as FaaS or Function-as-a-Service) is an emerging architecture that could be empowering a new generation of developers, transform the design and development of modern scalable applications. Software delivery and operation must be radically simplified. “It is important to note that serverless computing does not mean the absence of servers. The implementation still happens on real servers, but developers are relieved of installing and managing the infrastructure. The development team can then focus on the business logic and deploy the functions as soon as they are ready. These functions are completely stateless, allowing them to scale rapidly and independent from each other. As a consequence, serverless computing has made developers change the way they design, develop and deploy modern software“
Prerequisites
- One or 2+ servers (recommended), using Ubuntu 18.04.3 (Desktop or Server version, local or remote). Note: These servers should have a fixed IP address.
- Internet connection
Setup Kubernetes Cluster with Rancher 2.0
There are manifold options for deploying a local or remote Kubernetes cluster. You can find out them here . One of the easiest ways to build one is using Rancher.
Rancher is known as a platform to deliver Kubernetes-as-a-Service across any infrastructure and it could be used in both production and development environments.
In this experiment, I used 3 virtual machines running Ubuntu 18.04. All of them using sharing networking, which could connect to each other and have internet access. At least one plays a master role (Master node) and others are Worker nodes.
Step 1: Install the latest version of Docker
Docker is a mandatory ingredient and must be installed in all nodes (both Master and Worker)
Option 1: Using the following script
curl -fsSL https://get.docker.com -o get-docker.sh
sh get-docker.sh
Option 2: Do it step-by-step Install docker:
sudo apt install -y docker.io
After the installation is complete, start the docker service and enable it to run it every time at system boot.
systemctl start docker
systemctl enable docker
Grant privileges to manage Docker to non-root user (don’t have to use “sudo docker”)
sudo groupadd docker
sudo usermod -aG docker $USER
You can check it using the commands below:
systemctl status docker
docker —version
Step 2: Deploy Rancher Server on Master node
Login to Master node and install Rancher. It is nothing more than running a container. Following the official docs, from your shell, enter the following command:
sudo docker run -d --restart=unless-stopped -p 80:80 -p 443:443 rancher/rancher
It will take some minutes to complete. Once it’s done, log in to Rancher by the IP https://<server_ip> (replace with your Master node IP)
Then, you will be asked to setup a password for the admin account and confirm the Rancher Server URL
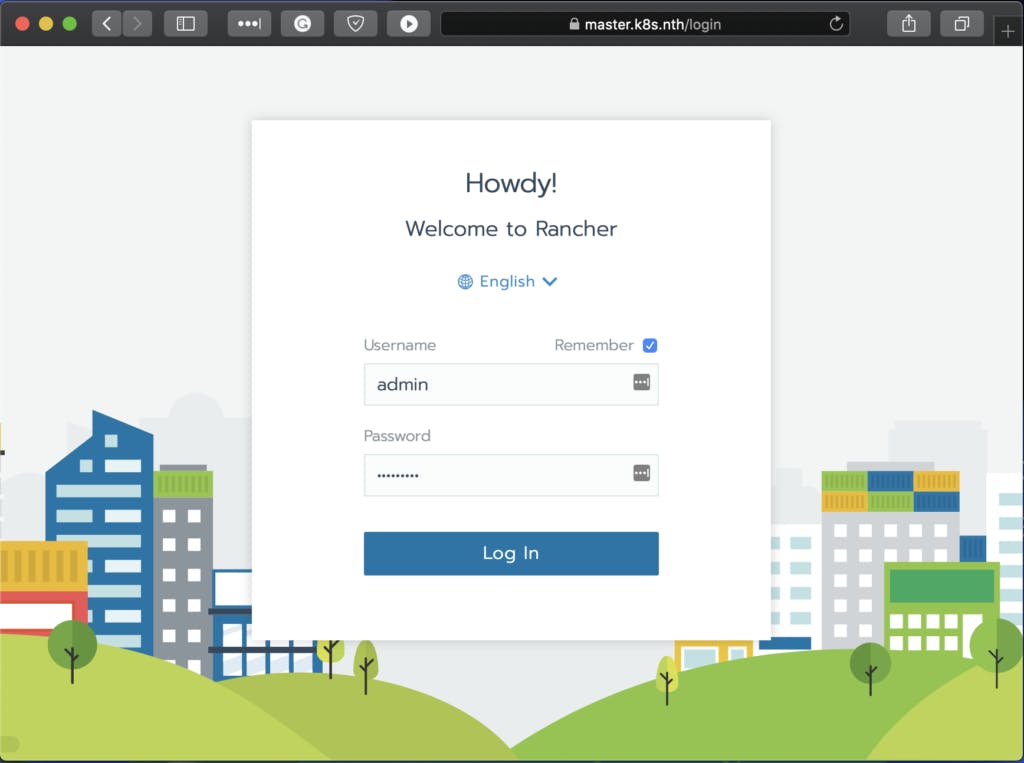 Login page of Rancher 2.0
Step 3: Setup the Kubernetes (K8s) Cluster
After login into the Rancher dashboard, click “Add Cluster” on the upper right corner.
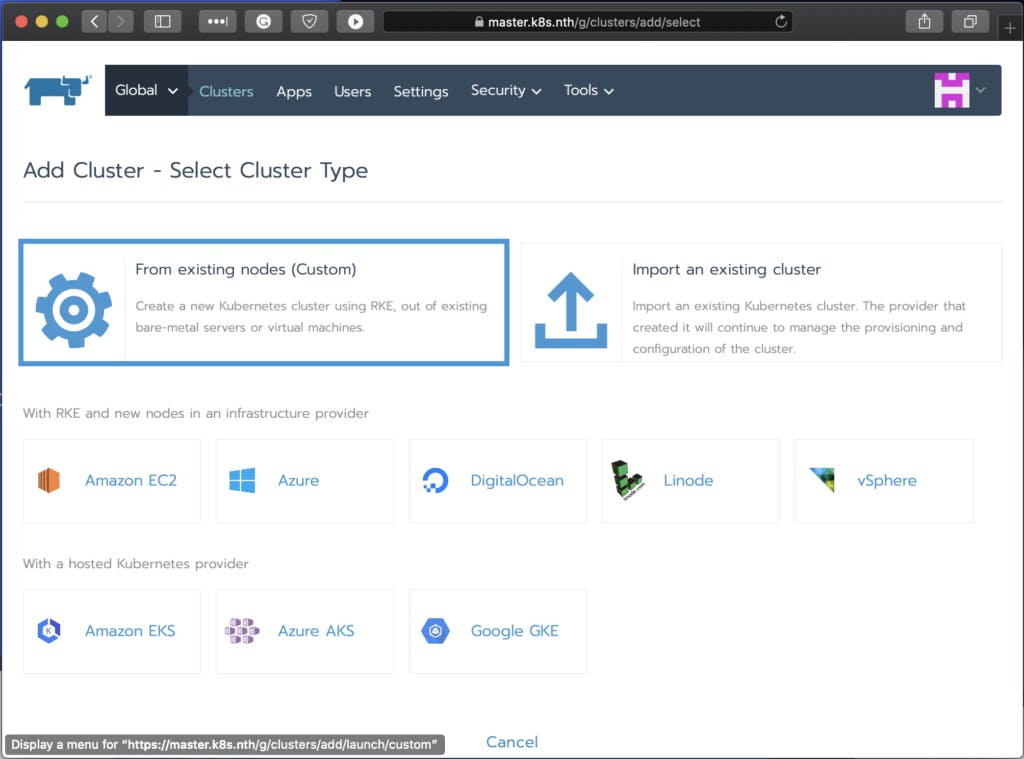 Then, select From existing nodes (Custom) to continue
Type Cluster name, keep other fields as default or customize them if needed
Then, select From existing nodes (Custom) to continue
Type Cluster name, keep other fields as default or customize them if needed
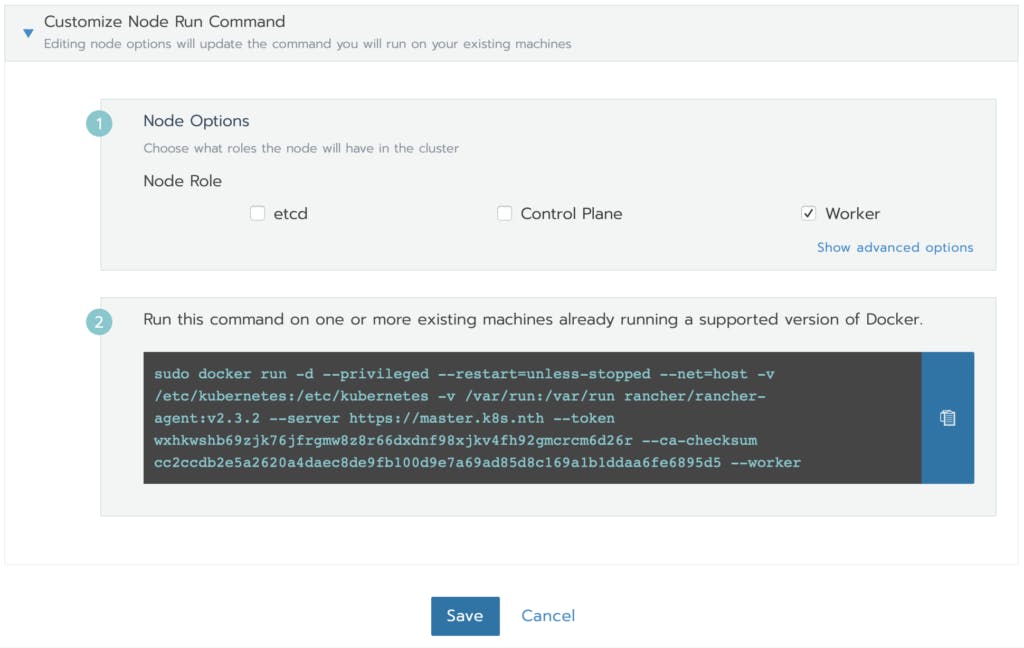
You will see the command to deploy Master and Worker nodes afterward:
 There are two cases: single node cluster and multi nodes cluster
Single Node Cluster:
If you only have one server play the role of both Master and Worker:
- Check all boxes in part 1 – Node Options (etcd, Control Plan, Worker)
- Then, copy the command in part 2 and run it on your shell on your server. The command will be looked like:
sudo docker run -d --privileged --restart=unless-stopped --net=host -v /etc/kubernetes:/etc/kubernetes -v /var/run:/var/run rancher/rancher-agent:v2.3.2 --server https://<server_ip> --token wxhkwshb69zjk76jfrgmw8z8raabbccf98xjkv4fh92gmcrcm6d26r --ca-checksum cc2ccdb2e5a2620a4daec8de9fb100daabbccad85d8c169a1b1ddaa6fe6895d5 --etcd --controlplane --workerMulti Nodes Cluster:
If you have 2 nodes or more than, then one is Master and others are Worker. You should set up follow the following rules: - Master node: check etcd and Control Plan and use the command in part 2 to run on Master node
- Worker node: check the only Worker and use the command in part 2 to run on all Worker nodes.
Note that, Rancher uses host name of each server as Node name by default. If you have 2 or more nodes have the same host name, you should define the different Node name for each other. Otherwise, the latter nodes couldn’t add to the Cluster.
After that, waiting for the provisioning process (it could take some minutes). When it’s done, you can see all nodes are activated in Nodes page
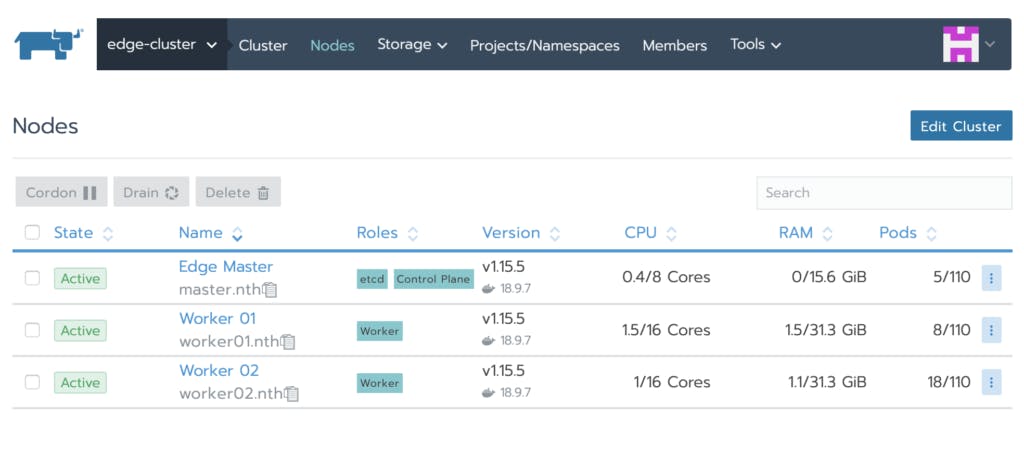 Setup Cluster is done
Step 4: Setup OpenFaaS – Serverless platform on Rancher K8s Cluster
OpenFaaS is a prevalent open-source platform for Serverless (besides OpenWhisk, Kubeless, Fission,…). OpenFaaS is Kubernetes-native and uses Deployments, Services, and Secrets. For more detail check out the “faas-netes” repository.
Presently, OpenFaaS is not available in the library of Rancher so we will need to install it by hand. Once you have a cluster, you can follow these steps. I will deploy by kubectl, you can try other options (like using Helm or k3sup by finding out on this page )
Install kubectl
Login to Master node and run following command on your shell
sudo snap install kubectl --classic
Put Rancher Kubeconfig file into Master node
Login to Kubernetes dashboard, on Cluster page, click Kubeconfig File on the upper right corner. You will see kubeconfig file in the new popup.
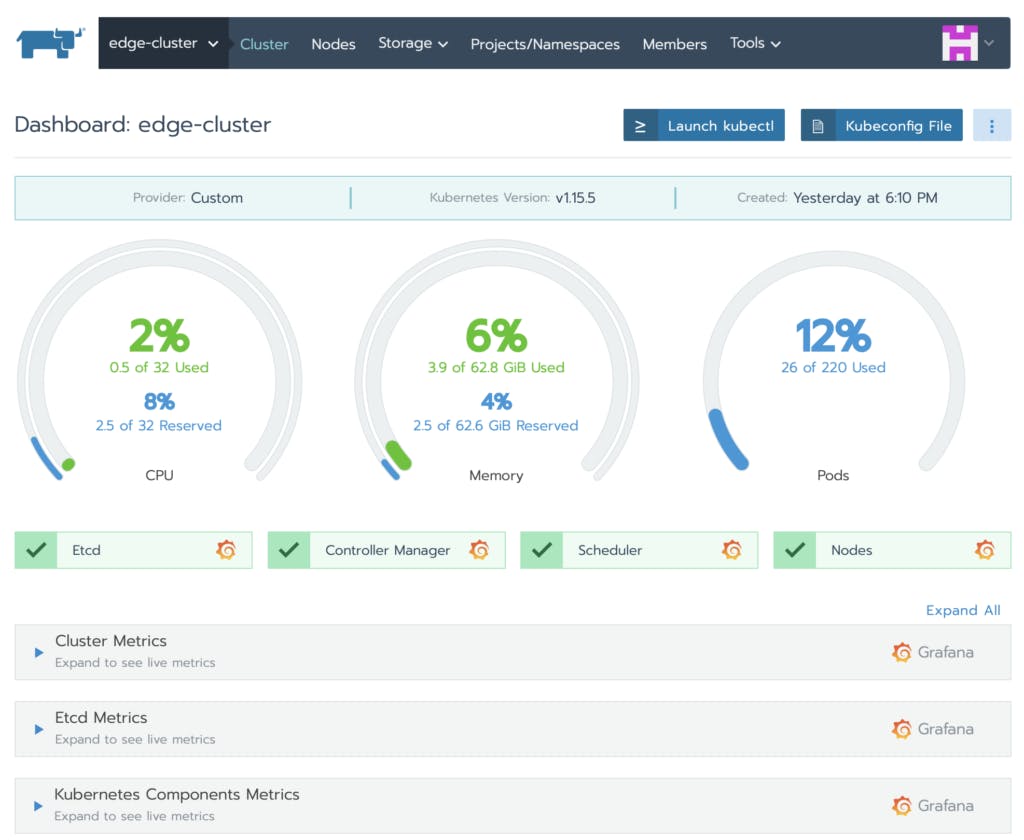 Main dashboard of Rancher
Then copy all and put this into the file in /home/<user-name>/kube/config (create a new file if it’s not exist).
Note that, you should change the permission of this file to ensure it could be accessible by the following command: sudo chmod 755 /home//.kube/config
Install OpenFaaS CLI
You can install the OpenFaaS CLI (to interact with CLI) using brew or a curl script.
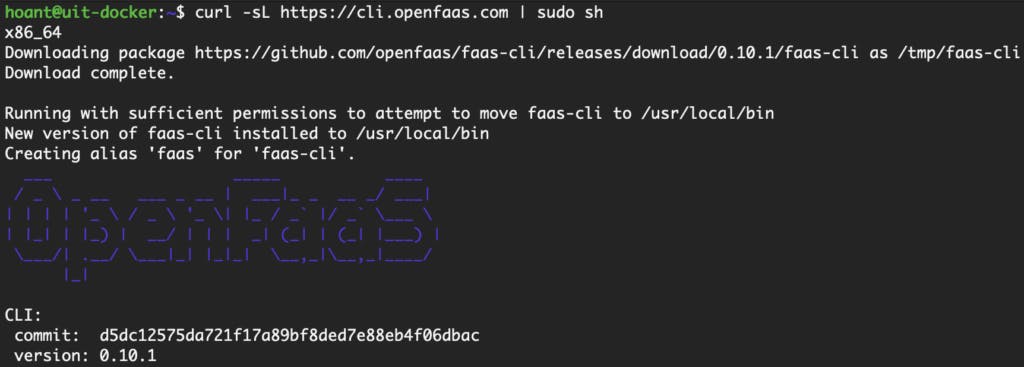 Install OpenFaaS CLI via curl
- Via curl:
curl -sL https://cli.openfaas.com | sudo sh - Via brew:
brew install faas-cli
Deploy OpenFaaS from faas-netes YAML and kubectl
Clone the repository:
git clone https://github.com/openfaas/faas-netes
Deploy the whole stack: This command is split into two parts so that the OpenFaaS namespaces are always created first:
- openfaas – for OpenFaaS services
- openfaas-fn – for functions
Enter to faas-netes folder and deploy openfass and openfaas-fn namespace
cd faas-netes
kubectl apply -f namespaces.yml --kubeconfig=/home/<user-name>/.kube/config
# Generate a random password
PASSWORD=$(head -c 12 /dev/urandom | shasum| cut -d' ' -f1)
kubectl -n openfaas create secret generic basic-auth \
--from-literal=basic-auth-user=admin \
--from-literal=basic-auth-password="$PASSWORD"
Note: You can use your own password and remember it to log in to OpenFaaS UI. If using the above command to generate a random password, then review and keep it (using echo $PASSWORD)
Deploy OpenFaaS:
In faas-netes folder, run following command:
kubectl apply -f ./yaml --kubeconfig=/home/<user-name>/.kube/config
Add OpenFaaS Project to Rancher
Back to the Rancher dashboard, navigate to Projects/Namespace, you will see 2 namespaces openfaas and openfaas-fn are created. Then, click Add Project on the upper right corner, enter Project Name (like openfaas or other up to you) and click Create. Next, select 2 openfaas namespaces and click Move button (on upper left corner) to move them to Project openfaas you have just created. Result:
 Create OpenFaaS project
When clicking on your project, you will see all your Workloads
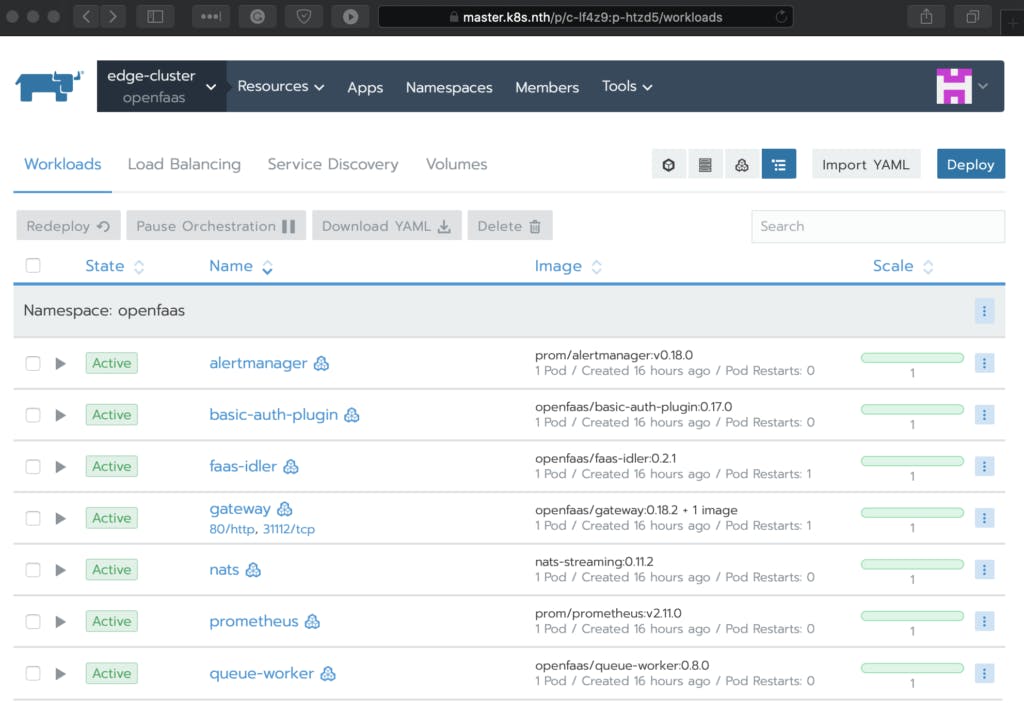 All workloads after deploy OpenFaaS
Set up OpenFaaS gateway to access OpenFaaS UI
Select Load balancing section, then click Add Ingress on the upper right corner. Type Ingress name, select Target is gateway workload, port like 8080, keep others fields á default and click Save.
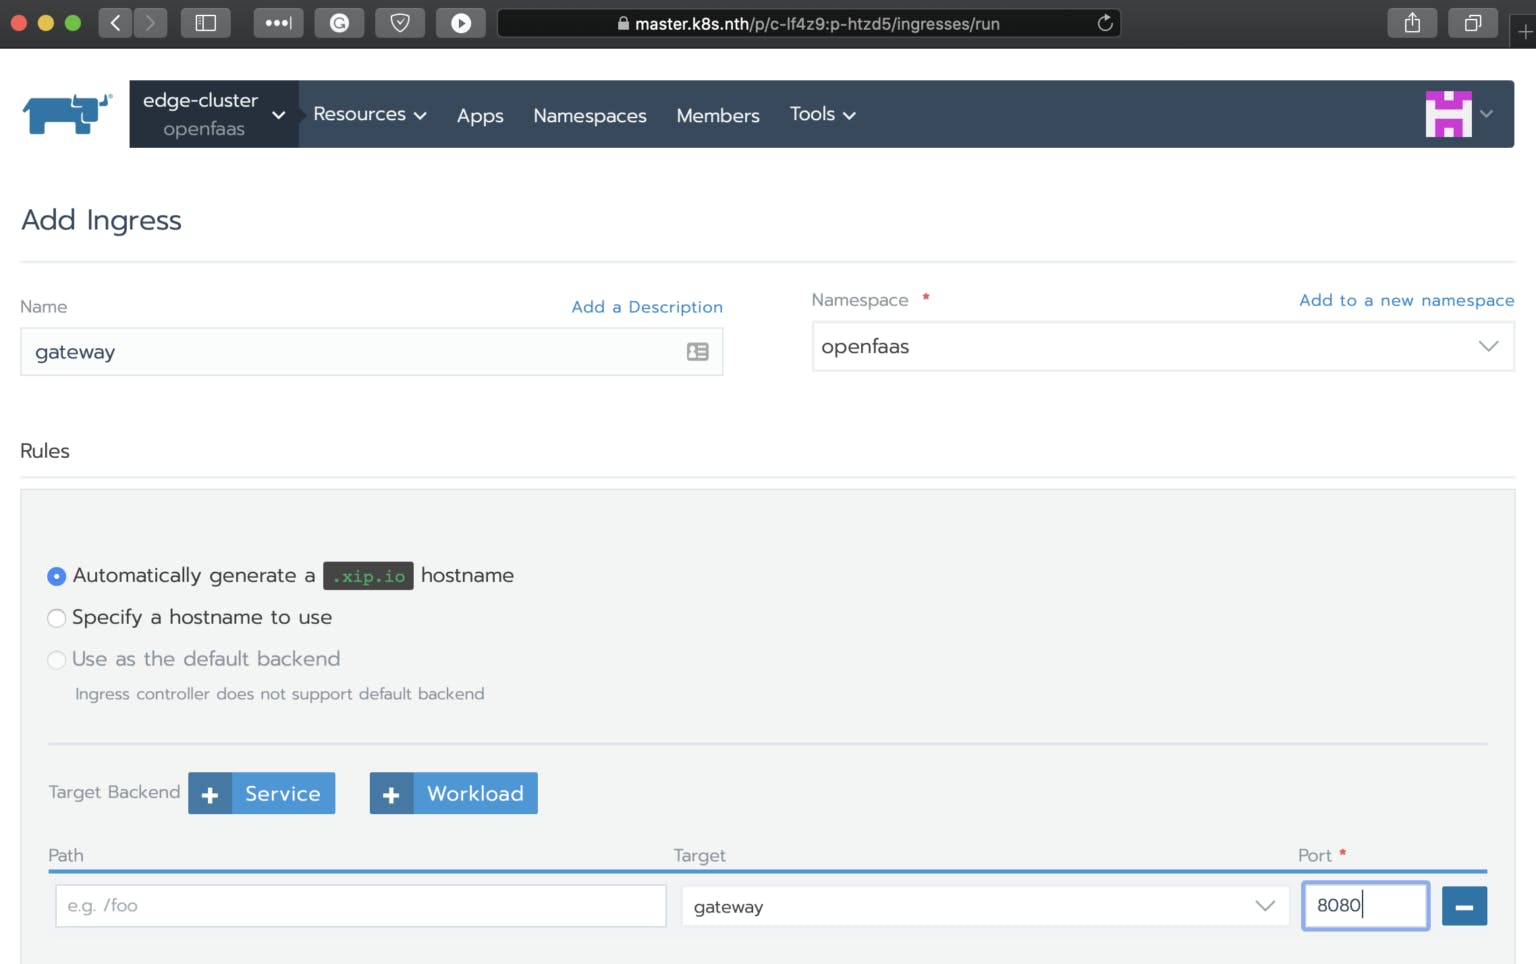 Setup Gateway Ingress
Config Gateway Environment
export OPENFAAS_URL=gateway.openfaas.<your_gateway_IP>.xip.io
Now, you can access OpenFaaS URL via the URL gateway.openfaas.<server-ip>.xip.io (in Targets) section and login with username admin and password in step 3
 Congratulation! OpenFaaS deployment on Rancher is completed and you can play with Serverless now.